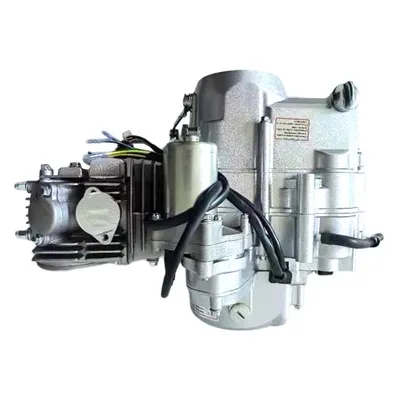
Hey there, ATV enthusiasts! I'm a supplier of 140 ATV engines, and today I'm gonna walk you through the process of replacing the camshaft in a 140 ATV engine. It might seem like a daunting task, but with the right tools and a bit of know - how, you can get it done.
Why Replace the Camshaft?
Before we jump into the replacement process, let's talk about why you might need to replace the camshaft. Over time, the camshaft can wear out due to constant friction, high - pressure operation, and lack of proper lubrication. A worn - out camshaft can lead to poor engine performance, like reduced power, rough idling, and even misfires. So, if you're experiencing any of these issues, it might be time to replace the camshaft.
Tools You'll Need
- Socket and wrench set: You'll need various sizes to remove bolts and nuts.
- Torque wrench: This is crucial to ensure you tighten the bolts to the correct specifications.
- Camshaft holding tool: It helps keep the camshaft in place during removal and installation.
- Gasket scraper: To clean the surfaces where the gaskets are located.
- Engine oil: You'll need to refill the engine after the job is done.
- Clean rags: To wipe down parts and keep things clean.
Step - by - Step Replacement Process
Step 1: Prepare Your Workspace
First things first, find a clean and well - lit area to work on your ATV. Make sure the engine is cool before you start. Disconnect the battery to prevent any electrical accidents. You don't want any unexpected sparks flying around!
Step 2: Remove the Valve Cover
Locate the valve cover on top of the engine. Use your socket and wrench set to remove the bolts holding the valve cover in place. Be careful not to lose any of the bolts. Once the bolts are removed, gently lift off the valve cover. You'll see the valve train and the camshaft.
Step 3: Remove the Camshaft Sprocket
The camshaft sprocket is attached to the end of the camshaft. There are usually a few bolts holding it in place. Loosen these bolts and remove the sprocket. You might need to use a camshaft holding tool to prevent the camshaft from rotating while you're removing the sprocket.


Step 4: Remove the Camshaft
Now, it's time to remove the camshaft itself. There are usually bearing caps that hold the camshaft in place. Use your socket and wrench set to remove these bearing caps. Make sure to keep track of which cap goes where, as they are often marked or shaped differently for a reason. Once the bearing caps are removed, carefully lift out the camshaft.
Step 5: Inspect the Camshaft and Related Parts
Take a good look at the old camshaft. Check for any signs of wear, like grooves, pitting, or excessive roughness. Also, inspect the camshaft bearings and the valve train components. If any of these parts are worn out, it's a good idea to replace them at the same time.
Step 6: Install the New Camshaft
Before installing the new camshaft, make sure to clean all the surfaces where the camshaft and its bearings will sit. Use a gasket scraper to remove any old gasket material. Apply a thin layer of engine oil to the camshaft lobes and bearings. Carefully place the new camshaft in position. Then, install the bearing caps in the correct order and tighten them to the specified torque using your torque wrench.
Step 7: Install the Camshaft Sprocket
Put the camshaft sprocket back on the end of the camshaft and tighten the bolts. Again, use the camshaft holding tool to prevent the camshaft from rotating.
Step 8: Reinstall the Valve Cover
Clean the surface of the valve cover and the engine where the gasket will be placed. Install a new gasket and carefully place the valve cover back on the engine. Tighten the bolts evenly to ensure a proper seal.
Step 9: Refill the Engine Oil
Open the oil filler cap and pour in the recommended amount of engine oil. Check the oil level using the dipstick to make sure it's at the correct level.
Related Engine Products
If you're interested in other engine products, we also offer some great options. For example, the TS300 Two - stroke 300CC Engine Assembly For KTM300 is a high - performance engine that can really boost your motorcycle's power. And if you have a Honda ATV or motorcycle, the 110cc Engine Motor Kit Semi Auto For Honda ATC 70 CT90 CT110 Z50 CRF50 XR is a great replacement option. Also, the 180cc Air Cooled 4 Stroke GY6 Single Cylinder Engine Assembly For Atv Motorcycle On Go Kart is a reliable choice for various off - road vehicles.
Conclusion
Replacing the camshaft in a 140 ATV engine is a challenging but doable task. By following these steps and using the right tools, you can give your engine a new lease on life. If you have any questions or need more information about our engine products, feel free to reach out. We're here to help you with all your engine needs. Whether you're a DIY enthusiast or a professional mechanic, we've got the parts and expertise to support you. So, don't hesitate to contact us for purchasing and further discussions.
References
- ATV engine repair manuals
- Manufacturer's specifications for the 140 ATV engine