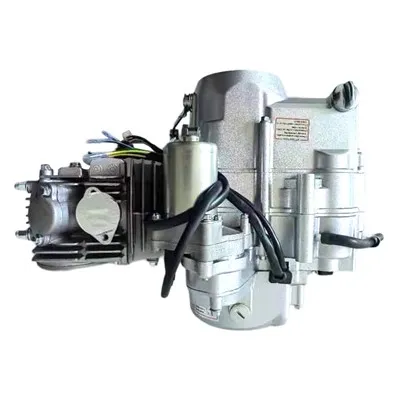
Adjusting the timing on a 140 ATV engine is a crucial maintenance task that can significantly impact the engine's performance, fuel efficiency, and overall longevity. As a supplier of 140 ATV engines, I've seen firsthand how proper timing adjustment can transform the riding experience. In this blog post, I'll guide you through the process of adjusting the timing on a 140 ATV engine, providing you with the knowledge and confidence to tackle this task yourself.
Why Timing Adjustment Matters
Before we dive into the adjustment process, let's understand why timing adjustment is so important. The engine's timing refers to the precise moment when the spark plug fires and the valves open and close in relation to the position of the piston. Proper timing ensures that the air-fuel mixture is ignited at the optimal time, allowing the engine to generate maximum power and efficiency.


If the timing is off, several issues can arise. For example, if the spark plug fires too early, the engine may experience knocking or pinging, which can damage the pistons and other internal components. On the other hand, if the spark plug fires too late, the engine may run poorly, with reduced power and increased fuel consumption. Additionally, incorrect valve timing can lead to poor combustion, rough idling, and even engine misfires.
Tools and Materials You'll Need
Before you begin adjusting the timing on your 140 ATV engine, gather the following tools and materials:
- Timing light: This tool is essential for accurately measuring the engine's timing. It works by flashing a light at the exact moment the spark plug fires, allowing you to see the position of the timing marks on the engine.
- Socket set: You'll need a socket set to remove the engine covers and access the timing components.
- Wrench: A wrench may be required to loosen and tighten certain bolts and nuts.
- Owner's manual: Your ATV's owner's manual is a valuable resource that provides detailed information about the engine's timing specifications and adjustment procedures.
Step-by-Step Timing Adjustment Process
Now that you have the necessary tools and materials, let's walk through the step-by-step process of adjusting the timing on a 140 ATV engine:
- Prepare the ATV: Park your ATV on a level surface and engage the parking brake. Make sure the engine is cool to the touch before proceeding.
- Locate the timing marks: Refer to your ATV's owner's manual to locate the timing marks on the engine. These marks are typically located on the crankshaft pulley or the flywheel.
- Connect the timing light: Connect the timing light to the spark plug wire of the cylinder you want to adjust. Follow the instructions provided with the timing light to ensure proper connection.
- Start the engine: Start the engine and let it warm up to operating temperature. Make sure the engine is running smoothly and at idle speed.
- Check the initial timing: Point the timing light at the timing marks on the engine. The timing light will flash a light at the exact moment the spark plug fires, allowing you to see the position of the timing marks. Compare the position of the timing marks to the specifications provided in your ATV's owner's manual. If the timing is off, you'll need to adjust it.
- Adjust the timing: To adjust the timing, you'll need to loosen the distributor hold-down bolt and rotate the distributor slightly. Turning the distributor clockwise will advance the timing, while turning it counterclockwise will retard the timing. Make small adjustments and recheck the timing using the timing light until it matches the specifications provided in your ATV's owner's manual.
- Tighten the distributor hold-down bolt: Once you've adjusted the timing, tighten the distributor hold-down bolt to secure the distributor in place.
- Recheck the timing: After tightening the distributor hold-down bolt, recheck the timing using the timing light to ensure it hasn't changed.
- Turn off the engine: Once you're satisfied with the timing, turn off the engine and disconnect the timing light.
Additional Tips and Considerations
- Use a professional mechanic: If you're not comfortable adjusting the timing on your 140 ATV engine yourself, it's recommended to take your ATV to a professional mechanic. A professional mechanic has the experience and expertise to perform the timing adjustment accurately and safely.
- Follow the manufacturer's instructions: Always follow the manufacturer's instructions and specifications when adjusting the timing on your ATV engine. Using the wrong timing settings can cause serious damage to the engine.
- Inspect the timing components: While you're adjusting the timing, it's a good idea to inspect the timing components for wear and damage. Replace any worn or damaged components as needed to ensure proper engine operation.
- Keep your ATV maintained: Regular maintenance is essential for keeping your ATV engine running smoothly and efficiently. Make sure to follow the manufacturer's recommended maintenance schedule, including oil changes, filter replacements, and spark plug inspections.
Related Products
As a supplier of 140 ATV engines, we also offer a wide range of related products to meet your needs. Here are some of our popular products:
- 110cc 4 Stroke Automatic Off-Road Wave Motorcycle Engine Assembly With Electric Start: This high-quality engine assembly is perfect for off-road motorcycles and ATVs. It features a 4-stroke design, automatic transmission, and electric start for easy operation.
- 110cc Dirt Bike Motor Electric Start Engine: This powerful dirt bike motor is designed for high-performance off-road riding. It features an electric start system for quick and easy starting, as well as a durable construction for long-lasting reliability.
- 140cc Engine Motor Kit For Pit Bike SSR Coolster 125 CT90 ATC70: This complete engine motor kit is designed to fit a variety of pit bikes, including SSR, Coolster, 125, CT90, and ATC70 models. It includes everything you need to upgrade your pit bike's engine, including the engine, carburetor, ignition system, and more.
Contact Us for Purchasing and Negotiation
If you're interested in purchasing a 140 ATV engine or any of our related products, we'd love to hear from you. Our team of experts is available to answer your questions, provide product recommendations, and assist you with the purchasing process. Contact us today to start the negotiation and find the perfect engine for your ATV.
References
- ATV Owner's Manual
- Automotive Repair Manuals