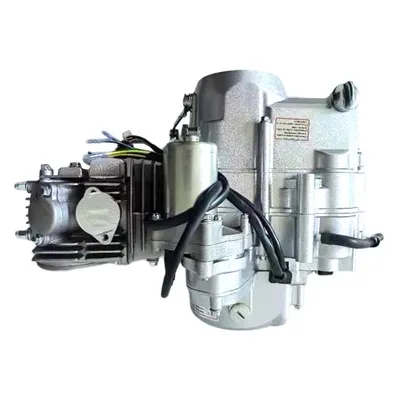
As an ATV engines supplier, I've had the privilege of witnessing the passion and enthusiasm that ATV enthusiasts bring to their machines. One common maintenance task that often comes up is replacing the alternator in an ATV engine. In this blog post, I'll guide you through the process step by step, sharing my expertise and insights along the way.
Why Replace the Alternator?
The alternator is a crucial component of an ATV's electrical system. Its primary function is to generate electricity while the engine is running, which powers the vehicle's electrical components and recharges the battery. Over time, alternators can wear out due to normal use, exposure to the elements, or electrical issues. Signs that your alternator may need replacement include a dead battery, dimming lights, or electrical malfunctions.
Tools and Materials You'll Need
Before you begin, gather the following tools and materials:
- Socket and wrench set
- Screwdriver set
- Pliers
- New alternator (make sure it's compatible with your ATV model)
- Gasket or sealant (if required)
- Electrical connector cleaner
- Safety glasses and gloves
Step 1: Prepare Your ATV
Park your ATV on a flat, stable surface and engage the parking brake. Allow the engine to cool down completely to avoid burns. Disconnect the negative terminal of the battery to prevent any electrical shocks or short circuits during the replacement process.
Step 2: Locate the Alternator
The alternator is typically located on the side or front of the engine. Refer to your ATV's service manual for the exact location. Once you've located the alternator, take note of the electrical connections and mounting bolts.
Step 3: Disconnect the Electrical Connections
Using a screwdriver or pliers, carefully disconnect the electrical connections from the alternator. These connections may include the battery cable, voltage regulator cable, and any other wires attached to the alternator. Make sure to label each connection or take a photo for reference during reinstallation.
Step 4: Remove the Mounting Bolts
Use a socket or wrench to remove the mounting bolts that secure the alternator to the engine. Depending on your ATV model, there may be one or more bolts. Keep the bolts in a safe place to avoid losing them.
Step 5: Remove the Old Alternator
Once the mounting bolts are removed, gently pull the alternator away from the engine. Be careful not to damage any surrounding components or wires. If the alternator is stuck, you may need to use a pry bar or a small amount of force to loosen it.


Step 6: Prepare the New Alternator
Before installing the new alternator, inspect it for any damage or defects. Clean the electrical connectors with an electrical connector cleaner to ensure a good connection. If required, apply a gasket or sealant to the mounting surface of the alternator to prevent leaks.
Step 7: Install the New Alternator
Position the new alternator in place and align it with the mounting holes on the engine. Insert the mounting bolts and tighten them securely using a socket or wrench. Make sure the alternator is firmly attached to the engine.
Step 8: Reconnect the Electrical Connections
Reconnect the electrical connections to the new alternator, following the labels or photo you took earlier. Make sure the connections are tight and secure. If necessary, use a screwdriver or pliers to tighten the connectors.
Step 9: Check the Belt Tension
If your ATV has a belt-driven alternator, check the belt tension. The belt should be tight enough to prevent slipping but not too tight that it causes excessive wear on the belt or the alternator. Refer to your ATV's service manual for the correct belt tension specifications.
Step 10: Reconnect the Battery
Once you've completed the installation, reconnect the negative terminal of the battery. Start the engine and check the electrical system to make sure everything is working properly. Look for any signs of electrical problems, such as dimming lights or a dead battery.
Step 11: Test the Alternator
To ensure that the new alternator is functioning correctly, you can perform a simple test using a multimeter. Set the multimeter to the DC voltage setting and connect the positive lead to the battery terminal and the negative lead to the ground. Start the engine and let it run at idle. The multimeter should read between 13.5 and 14.5 volts, indicating that the alternator is charging the battery.
Tips and Tricks
- Always refer to your ATV's service manual for specific instructions and torque specifications.
- Use the correct tools for the job to avoid damaging the alternator or other components.
- Take your time and be careful when working with electrical connections to prevent short circuits.
- If you're unsure about any step of the process, consult a professional mechanic or an ATV expert.
Conclusion
Replacing the alternator in an ATV engine may seem like a daunting task, but with the right tools, knowledge, and patience, it can be a straightforward process. By following the steps outlined in this blog post, you can save money on labor costs and keep your ATV running smoothly. Remember, if you have any questions or need further assistance, don't hesitate to reach out.
As an ATV engines supplier, we offer a wide range of high-quality engines and parts for your ATV. Whether you're looking for a 110cc 125cc Automatic Clutch Engine For ATV, a 110cc 125cc Automatic Clutch Engine for ATV, or a Cg150 Cg200 Cg250 Engine with Reverse Four Wheeler, we've got you covered. Contact us today to discuss your specific needs and start the procurement process.
References
- ATV service manual
- Automotive repair guides