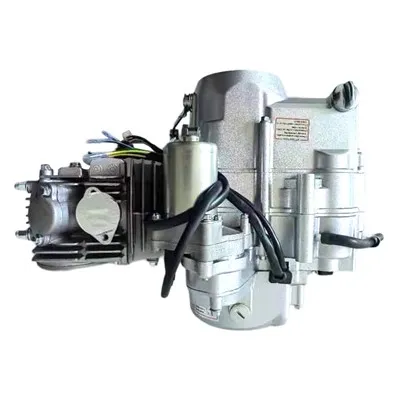
As a supplier of CG150 engines, I often receive inquiries from customers about engine maintenance and repair. One of the most common questions is how to replace the piston in the CG150 engine. In this blog post, I'll walk you through the process step by step, sharing my expertise as a professional in the field.
Tools and Materials You'll Need
Before you start the piston replacement process, it's essential to gather all the necessary tools and materials. Here's a list to help you get prepared:
- Socket wrench set
- Torque wrench
- Piston ring compressor
- Gasket scraper
- Piston and piston ring kit (make sure it's compatible with your CG150 engine)
- Engine oil
- Cleaning solvent
- Rags
Step 1: Prepare the Workspace
First, ensure you have a clean, well - lit workspace. Park the motorcycle on a level surface and let the engine cool down completely. This is crucial as working on a hot engine can be dangerous and may cause burns. Disconnect the battery to prevent any electrical accidents during the repair process.
Step 2: Remove the Cylinder Head
Using the socket wrench set, remove the bolts that secure the cylinder head to the engine block. Carefully lift the cylinder head off the engine. Be gentle as there may be a gasket between the cylinder head and the block, and you don't want to damage it. Place the cylinder head on a clean surface and set the bolts aside in a safe place.
Step 3: Remove the Piston and Connecting Rod
Once the cylinder head is removed, you'll be able to see the piston inside the cylinder. Locate the piston pin clip and use a small flat - tip screwdriver to carefully remove it. After removing the clip, you can push the piston pin out. This will separate the piston from the connecting rod.
Next, remove the connecting rod cap bolts using the socket wrench. Gently tap the connecting rod to loosen it from the crankshaft journal. Then, lift the piston and connecting rod assembly out of the cylinder. You may need to use some force, but be careful not to scratch the cylinder walls.
Step 4: Inspect the Cylinder and Piston
Now that you have removed the piston, it's time to inspect the cylinder and the piston itself. Check the cylinder walls for any signs of scoring, scratches, or wear. If there are significant signs of damage, the cylinder may need to be honed or replaced.
Inspect the piston for any cracks, excessive wear on the piston rings, or carbon buildup. If the piston is damaged beyond repair, you'll need to replace it with a new one from a piston and piston ring kit.
Step 5: Clean the Parts
Use a cleaning solvent and rags to clean the cylinder walls, piston, connecting rod, and cylinder head. Make sure to remove all the carbon deposits, dirt, and old engine oil. This will ensure that the new piston and other components fit properly and function smoothly.
Step 6: Install the New Piston
Before installing the new piston, lubricate the piston rings and the cylinder walls with engine oil. This will reduce friction during the initial startup of the engine. Use a piston ring compressor to compress the piston rings so that the piston can fit into the cylinder.
Carefully slide the piston and connecting rod assembly into the cylinder. Make sure the piston is oriented correctly. The piston usually has an arrow or some other marking indicating the front of the engine.
Reattach the connecting rod cap to the crankshaft journal and tighten the bolts to the specified torque using a torque wrench. This is important as over - tightening or under - tightening the bolts can lead to engine problems.


Step 7: Install the Cylinder Head
Place a new gasket on the engine block. Carefully lower the cylinder head onto the block, aligning it with the cylinder. Install the cylinder head bolts and tighten them gradually in a criss - cross pattern to ensure even pressure distribution. Again, use a torque wrench to tighten the bolts to the manufacturer's specifications.
Step 8: Reconnect the Battery and Test the Engine
Reconnect the battery and start the engine. Listen for any unusual noises or vibrations. Check for any oil leaks around the cylinder head and other engine components. If everything sounds and looks normal, let the engine run for a few minutes to warm up.
Additional Resources
If you're interested in exploring other engine options, we offer a wide range of products. You can check out our Cg150 Cg200 Cg250 Motorcycle Engine Tricycle Engine With Balance Shaft, which is designed for high - performance and reliability. For those specifically looking for 200cc engines, our 200cc Cg200 Tricycle Engine and Engine Parts are a great choice. And if you need a powerful 250cc engine, take a look at our ATV Dirt Bike Motorcycle 4 Stroke 250cc Cg250 Air - cooled Engine for Yx Lf.
Contact Us for Purchasing
If you have any questions about piston replacement, or if you're interested in purchasing a CG150 engine or related parts, feel free to reach out to us. Our team of experts is always ready to assist you with your engine needs and guide you through the purchasing process.
References
- Motorcycle repair manuals for CG150 engines
- Industry - standard engine repair guides