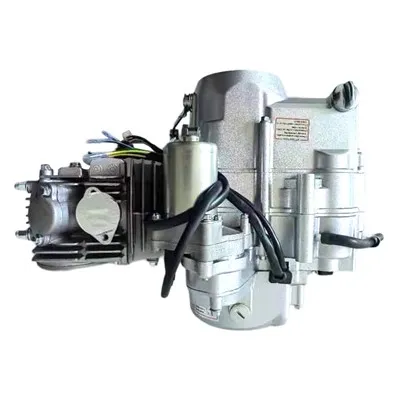
As a supplier of CB250 engines, I've seen firsthand the importance of maintaining and replacing parts on bikes with these engines. One crucial component that may need replacement over time is the drive chain. In this blog post, I'll guide you through the process of replacing the drive chain on a bike equipped with a CB250 engine.
Why Replace the Drive Chain?
The drive chain on a motorcycle plays a vital role in transferring power from the engine to the rear wheel. Over time, chains can wear out due to factors such as friction, dirt, and lack of proper lubrication. A worn - out chain can lead to poor performance, increased fuel consumption, and even pose a safety risk. By replacing the drive chain at the appropriate time, you can ensure smooth operation and extend the lifespan of your bike.
Tools You'll Need
Before you start the chain replacement process, gather the following tools:
- Chain breaker tool: This is used to remove the old chain and install the new one.
- Socket set: You'll need various socket sizes to remove the necessary components.
- Pliers: For holding and manipulating small parts.
- Lubricant: To lubricate the new chain after installation.
- Cleaning supplies: Such as a brush and degreaser to clean the sprockets.
Step - by - Step Guide to Replacing the Drive Chain
Step 1: Prepare Your Bike
First, make sure your bike is on a stable surface. If possible, use a motorcycle stand to elevate the rear wheel off the ground. This will give you better access to the drive chain and sprockets. Also, turn off the engine and let it cool down completely to avoid any burns.
Step 2: Inspect the Sprockets
Before installing a new chain, it's essential to inspect the front and rear sprockets. Look for signs of wear, such as teeth that are sharp, hooked, or worn down. If the sprockets are worn, they should be replaced along with the chain. Worn sprockets can cause premature wear on a new chain.
Step 3: Remove the Old Chain
Locate the master link on the old chain. The master link is a special link that holds the chain together. Use the chain breaker tool to push out the pin on the master link. Once the pin is removed, you can separate the chain and take it off the sprockets.
If your chain doesn't have a master link, you'll need to use the chain breaker tool to break the chain at a suitable point. Make sure to keep track of how the chain was routed around the sprockets so you can install the new chain correctly.
Step 4: Clean the Sprockets
Use a brush and degreaser to clean the front and rear sprockets thoroughly. Remove any dirt, grime, or old lubricant. A clean sprocket will ensure proper engagement with the new chain and reduce wear.
Step 5: Measure and Cut the New Chain
When selecting a new chain, make sure it is the correct size for your CB250 engine - equipped bike. Most chains come in a standard length and will need to be cut to fit. To measure the correct length, wrap the new chain around the sprockets in the same way the old chain was routed. Leave a small amount of slack in the chain. Use the chain breaker tool to cut the chain to the appropriate length.
Step 6: Install the New Chain
Place the new chain around the front and rear sprockets. If your chain has a master link, connect the two ends of the chain using the master link. Make sure the master link is installed correctly, with the clip facing in the direction of chain rotation. If there is no master link, use the chain breaker tool to install a new pin to connect the chain ends.
Step 7: Adjust the Chain Tension
Proper chain tension is crucial for the performance and longevity of your chain. Refer to your bike's owner's manual for the recommended chain tension specifications. Usually, you can adjust the chain tension by loosening the rear axle nuts and using the chain adjusters on the swingarm. Adjust the chain until it has the correct amount of slack, then tighten the rear axle nuts.


Step 8: Lubricate the Chain
After installing and adjusting the chain, apply a high - quality chain lubricant. Make sure to lubricate the entire length of the chain, especially the rollers and pins. This will reduce friction and wear, and help the chain last longer.
Importance of Quality Parts
When replacing the drive chain on your CB250 - engine bike, it's important to use high - quality parts. As a CB250 engine supplier, I understand the significance of using reliable components. Inferior chains can break more easily, leading to costly repairs and potential safety hazards.
We offer a wide range of high - quality motorcycle engines and parts, including chains that are specifically designed to work well with CB250 engines. For example, you can check out our Motorcycle Engine Assembly Cg200 Cg250 Cg300 Water Cooling Tricycle Engine for 3 Wheels Loncin, Cg150 Cg200 Cg250 Motorcycle Engine Tricycle Engine With Balance Shaft, and 200cc Cg200 Tricycle Engine and Engine Parts. These products are built to last and provide optimal performance.
Maintenance Tips After Chain Replacement
Once you've replaced the drive chain, regular maintenance is key to keeping it in good condition. Here are some maintenance tips:
- Regular lubrication: Lubricate the chain every few hundred miles or as recommended by the manufacturer. This will prevent rust and reduce friction.
- Cleaning: Periodically clean the chain to remove dirt and debris. A dirty chain can wear out faster and cause problems.
- Tension check: Check the chain tension regularly. Over time, the chain may stretch, and improper tension can lead to chain skipping or premature wear.
Contact Us for Your CB250 Engine and Parts Needs
If you're in the market for a new CB250 engine or need replacement parts such as chains, sprockets, or other components, we're here to help. Our team of experts can provide you with the right products and advice to ensure your bike runs smoothly. Contact us to start a procurement discussion and find the best solutions for your motorcycle needs.
References
- Motorcycle Owner's Manuals: These are valuable resources for specific information about your bike's chain replacement and maintenance.
- Motorcycle Repair Guides: Available in bookstores or online, these guides offer detailed instructions on various motorcycle repair tasks.