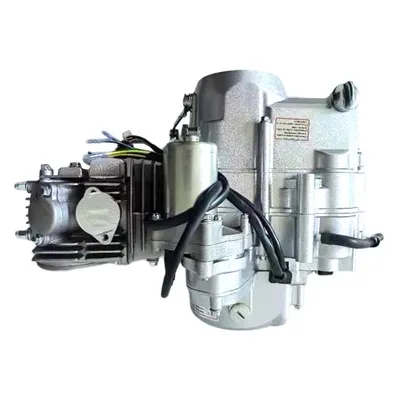
As a supplier of 250 quad motors, I often receive inquiries from customers about how to connect these motors to a controller. Connecting a 250 quad motor to a controller is a crucial step in building or maintaining a quadcopter or other similar unmanned aerial vehicles (UAVs). In this blog post, I will guide you through the process, step by step, to ensure a successful connection.
Understanding the Basics
Before we start the connection process, it's essential to understand the basic components involved. A 250 quad motor is a brushless DC motor designed to provide the necessary thrust for a quadcopter. The controller, on the other hand, is responsible for regulating the speed and direction of the motor based on the input from the flight controller.


Tools and Materials Needed
To connect a 250 quad motor to a controller, you will need the following tools and materials:
- 250 Quad Motor: Our high - quality 250 quad motors are designed for optimal performance and durability.
- Motor Controller: Make sure the controller is compatible with your 250 quad motor in terms of voltage, current rating, and communication protocol.
- Soldering Iron and Solder: For making secure electrical connections.
- Wire Cutters and Strippers: To cut and strip the wires.
- Heat Shrink Tubing: To insulate the soldered connections.
- Multimeter: To test the electrical connections and ensure proper voltage and current flow.
Step 1: Identify the Motor Wires
Most 250 quad motors have three wires, typically colored black, red, and white or some other combination. These wires are used to provide power to the motor and control its rotation. The order of the wires can affect the direction of the motor's rotation. If the motor rotates in the wrong direction, you can simply swap any two of the wires.
Step 2: Prepare the Controller
The motor controller also has wires that need to be connected to the motor. Locate the output wires of the controller that are intended for the motor connection. These wires are usually labeled or color - coded for easy identification.
Step 3: Solder the Connections
- Strip the Wires: Use wire strippers to remove about 1/4 inch of insulation from the ends of the motor wires and the controller output wires.
- Twist the Wires Together: Match the corresponding wires from the motor and the controller (e.g., black to black, red to red) and twist them together tightly.
- Solder the Joints: Heat the twisted wires with a soldering iron and apply a small amount of solder to the joint. Make sure the solder flows evenly and creates a solid connection. Avoid using too much solder, as it can cause short - circuits or add unnecessary weight.
- Insulate the Connections: Slide a piece of heat - shrink tubing over each soldered joint. Use a heat gun or a lighter to shrink the tubing, providing insulation and protection for the connection.
Step 4: Test the Connection
Before mounting the motor and controller on the quadcopter, it's important to test the connection.
- Power On the Controller: Connect the controller to a power source, following the manufacturer's instructions. Make sure the power supply is within the rated voltage of the controller.
- Check the Motor Operation: Use a multimeter to measure the voltage across the motor wires. You can also use a motor tester or a flight controller to send a test signal to the motor. The motor should start rotating smoothly. If the motor does not rotate or makes unusual noises, check the connections for any loose or short - circuited wires.
Step 5: Mount the Motor and Controller
Once you have verified that the motor is working properly, you can mount the motor and controller on the quadcopter frame. Make sure the motor is securely fastened and the controller is placed in a location where it can be easily accessed for future maintenance.
Additional Considerations
- Motor Placement: The placement of the motors on the quadcopter frame is crucial for balanced flight. Make sure the motors are evenly spaced and aligned according to the design of the quadcopter.
- Wiring Management: Keep the wires organized and away from moving parts to prevent them from getting tangled or damaged during flight. You can use cable ties or wire looms to manage the wiring.
- Compatibility: Ensure that the motor and controller are compatible with the flight controller and other components of the quadcopter. This includes the power system, communication protocol, and control signals.
Related Products
If you are interested in other types of engines, we also offer a wide range of products such as 200cc Cg200 Tricycle Engine and Engine Parts, Cb150 Cb200 Cb250 Motorcycle Engine with Balance Shaft, and Cg125 Cg150 Tricycle Engine Air Cool for Three Wheels. These engines are designed for high performance and reliability.
Conclusion
Connecting a 250 quad motor to a controller is a relatively straightforward process if you follow the steps outlined above. By ensuring proper connections, testing the operation, and considering additional factors such as motor placement and wiring management, you can build a reliable and high - performing quadcopter.
If you have any questions about our 250 quad motors or need further assistance with the connection process, feel free to contact us for procurement and discussion. We are here to provide you with the best products and support.
References
- Dr. Richard A. DeVolder. "Brushless DC Motors: Principles, Control, and Applications." CRC Press, 2018.
- Andrew S. Gibbings. "Unmanned Aerial Vehicle Design: A Practical Engineering Guide." Wiley, 2019.